BASIC COBOL COMMANDS
In this section, we will be studying about some basic COBOL commands that are must to learn before proceeding to the main programming section. By using these commands, we will be able to display the result and make any further progress.
- DISPLAY AND MOVE COMMANDS IN COBOL
The display command is simply used to display the output of the program.
The move command is used to assign a value to a variable. There are different types of move commands, which are given below:
- simple move
- substring move -reference mod
- corresponding move
SAMPLE PROGRAM:1
This is a demo program to learn and understand the properties of move and display commands clearly.
|
1
2
3
4
5
6
7
8
9
10
11
|
ENVIRONMENT DIVISION.
DATA DIVISION.
WORKING–STORAGE SECTION.
01 WS–HELLO PIC X(12).
PROCEDURE DIVISION.
MAIN PARA.
MOVE “HELLO WORLD” TO WS–HELLO.
DISPLAY WS–HELLO.
STOP RUN.
|
OUTPUT:
|
1
2
3
|
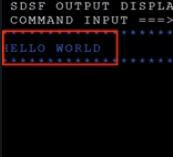
HELLO WORLD
|
In the above program, firstly, we have declared a variable “WS-HELLO” in the working-storage section. Later in the procedure division, “WS-HELLO” has been assigned with the hello word’s value using the move command.
Finally, using the display command “WS-HELLO” has been printed on the output screen with the value Hello world.
SAMPLE PROGRAM -2
This is a demo program to learn and understand different types of move commands, i.e., substring move /reference modification and corresponding.
|
1
2
3
4
5
6
7
8
9
10
11
12
13
14
15
16
17
18
19
20
21
22
23
24
25
26
27
28
29
30
31
32
33
34
|
ENVIRONMENT DIVISION.
DATA DIVISION.
WORKING–STORAGE SECTION.
01 WS–HELLO PIC X(12).
01 WS–REF–MOD PIC X(05).
01 GP–1.
02 A PIC 9(2).
02 B PIC 9(2) .
02 C PIC 9(2) .
01 GP–2 .
02 A PIC 9(2) .
02 D PIC 9(2) .
02 C PIC 9(2) .
02 B PIC 9(2) .
PROCEDURE DIVISION.
MAIN PARA.
MOVE 12 TOA OF GP–1 .
MOVE 23 TO B OF GP–1 .
MOVE 45 TO B OF GP–1 .
MOVE 86 TOD .
DISPLAY “GROUP MOVE : “
MOVE GP–1 TO GP–2 .
DISPLAY GP–2 .
MOVE “HELLO WORLD” TO WS–HELLO.
MOVE WS–HELLO(7:5) TO WS–REF–MOD .
MOVE CORRESPONDING GP–1 TO GP–2 .
DISPLAY “REFERENCE MODIFICATION : “ .
DISPLAY WS–REF–MOD.
DISPLAY “CORRESPONDING : “ .
DISPLAY GP–2 .
DISPLAY WS–HELLO.
STOP RUN.
|
OUTPUT:
|
1
2
3
4
5
6
7
8
9
10
|
HELLO WORLD
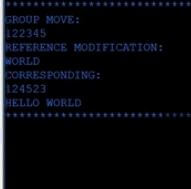
GROUP MOVE :
122345
REFERENCE MODIFICATION :
WORLD
CORRESPONDING :
1245523
HELLO WORLD
|
In the above program, first, we have declared a variable “WS-HELLO” in the working-storage section, which has a length of 12, and is an alphanumeric character. The MOVE command has assigned the value of hello world to WS-HELLO, and later using the DISPLAY command, we have obtained the output hello world on our output window.
This is a simple example of using a simple move, and even with the help of simple, we can move a group variable to another group.
In the above example, we have assigned variables A, B, and C of group 1 with values 12,23,45, respectively. We can move the values of group 1 to group 2 by using the move command.
MOVE 12 TOA OF GP-1 .
MOVE 23 TO B OF GP-1 .
MOVE 45 TO B OF GP-1 .
MOVE 86 TOD .
DISPLAY “GROUP MOVE :”
MOVE GP-1 TO GP-2 .
If we want to move only the world part, we can use the substring or the reference mod move property, as we have already given the value of hello world to WS-HELLO with a string length of 12. To do this we need to count the position from where we have to move our element. As in the above example, HELLO WORLD, World starts at position seven and has a length of 5; therefore, we use the command given below
MOVE WS-HELLO(7,5) TO WS-REF-MOD .
Here, 7 denotes the starting position, and 5 refers to the length of the remaining string and moves the value to element WS-REF-MOD.
Lastly, we have corresponding; to understand it, suppose we have two group elements. The data item contains the same name, and then we can use the corresponding method to differentiate which particular data item to be selected.
We have defined two group variables GP-1 and GP-2, and inside these groups, we have defined various elementary items.
To move the value from the element of group 1 to the element with the same name in group 2, we will use the corresponding command.
MOVE CORRESPONDING GP-1 TO GP-2.
This will allow us to move the value of elements A, B, and C from group 1 to elements A, B, and C of group 2, respectively, but D’s value will remain constant as group 1 does not contain element D.
ACCEPT COMMAND
This command is used to accept values from JCL(JOB CONTROLLED LANGUAGE) or a system/ predefined values.
Example: –
ACCEPT EMPLOYEE-DEBT.
ACCEPT CURRENT-DATE FROM DATE.
Data from the program can be passed using the “SYSIN” parameter, which is coded in JCL, and the output also has to be coded with JCL, which can be seen using the perimeter “SYSOUT”.
1) SYSIN PARAMETER: – It is a way of passing input data to the program. It’s an optional parameter. To accept the program’s data, we have to use the “ACCEPT” statement in COBOL.
SYNTAX=>
|
1
2
3
4
5
6
7
8
9
|
a) //SYSIN DD *
values.....
/*
DD *-> instream data
b) //SYSIN DD DATA
values....
//*
|
Apart from SYSIN, there is another way of passing data to the program, known as “PARM”.
If both SYSIN and PARM are defined in JCL, PRAM always gains the upper hand and always overrides the value passed through SYSIN.
2)SYSOUT PARAMETERS- it’s an optional JCL parameter used to display output in the output class or the spool area.
SYNTAX=>
|
1
2
3
4
5
|
a) //DDNAME DD SYSOUT=*
b) //DDNAME DD SYSOUT=P
Where p denotes any good class.
|
Sample program – 7
This is a demo program to learn and understand the compiling of JCL through a hello world program.
1.COBOL Program
|
1
2
3
4
5
6
7
|
IDENTIFICATION DIVISION.
PROGRAM–ID. COB001.
PROCEDURE DIVISION.
DISPLAY “HELLO WORLD”.
STOP RUN.
|
2.Compile JCL
|
1
2
3
4
5
6
7
8
9
10
11
|
//MATEKSD JOB MSGLEVEL=(1,1),NOTIFY=&SYSUID
//*
//* COMPILE A COBOL PROGRAM
//*
//CL EXEC COBOLCL,
// COPYLIB=MATEKS.COPYLIB, <= COPYBOOK LIBRARY
// LOADLIB=MATEKS.LOADLIB, <= LOAD LIBRARY
// SRCLIB=MATEKS.COBOL.SRCLIB, <= SOURCE LIBRARY
// MEMBER=COB001 <= SOURCE MEMBER
|
Note: first, we are provided with the COBOL program, which will be common through all the platforms. But in the second part, we are provided with Compile JCL and RUN JCL, which are provided by your Mainframe Admin, and these may vary from company to company and provider to provider.
The above-provided JCL code may or may not work for your compiler because it depends on the machine you are working on, and many companies tweak the compile JCL and RUN JCL as per their standards.
3.RUN JCL
|
1
2
3
4
5
6
7
8
9
|
//MATEKSD JOB MSGLEVEL=(1,1),NOTIFY=&SYSUID
//*
//* RUN A COBOL PROGRAM,
//*
//STEP01 EXEC PGM=COB001
//STEPLIB DD DSN=MATEKS.LOADLIB,DISP=SHR
//SYSOUT DD SYSOUT=*
|
Basic MAINFRAME and SERVERSIDE commands to start with (optional)
Till now, we have taken a brief understanding of what is COBOL? What is MAINFRAME, IBM, and JCL? Before directly going over COBOL commands, we have to understand a few of the JCL commands to give the mainframe server instructions to the terminal server.
|
1
2
3
4
5
6
7
8
9
10
11
12
13
14
15
16
17
18
19
|
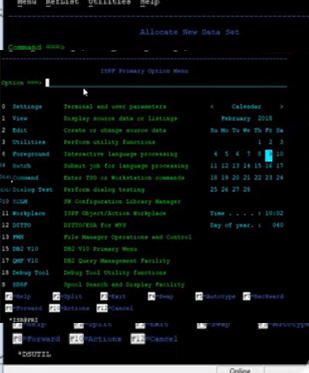
ISPF Primary Option Menu
0 SETTING– – terminal and user parameters
1 VIEW– – Display source data or listing
2 EDIT – Create or change source data
3 UTILITIES – Perform utility functions
4 FOREGROUND – Interactive language processing
5 BATCH – submit a job for language processing
6 COMMAND – Enter TSO or Workstation commands
7 DIALOG TEST – perform dialog testing
10 SCLM – SW configuration library manager
11 WORKPLACE –ISPF object/action workplace
12 DITTO – DITTO/ESA for MVS
13 FMN – file manager operations and control
15 DB2 V10 – DB2 V10 Primary menu
17 QMF V10 – DB2query management facility
18 DEBUG TOOL – Debug tool utility function
S SDSF – spool search and Display function
|
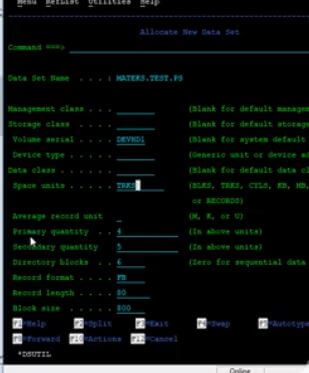
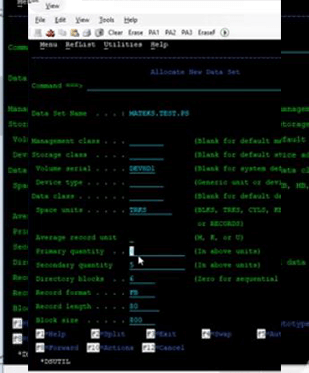
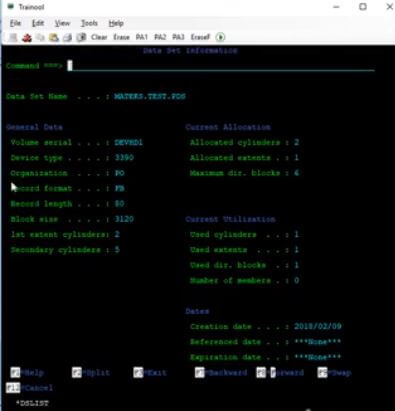
CREATING DATASETS -PS AND PDS (optional)
PS– stands for physical sequential, and is similar to file; the records in PS files are stored in sequential order.
PDS– stands for partitioned data set, and is similar to a folder
To create a data set you can copy all the data sets defined below
Some space units we must learn before proceeding further.
|
1
2
3
4
5
6
7
8
|
BLKS – BLOCKS
TRKS – TRACKS
CYLS – CYLINDER
KB – KILO BYTES
MB – MEGA BYTES
BYTES
|
- 1 TRACK ~192KB OR 48KB OR 56KB mainly depending on which type of DASD used
- 1 CYLINDER = 15 TRACKS
- 1 TRACK has minimum 6 BLOCK
à A sequential data set can have 16 extent on each volume
à A PDS can have 16 extents
à A PDSE can have 123 extents
Units of Space Allocated
PRIMARY QUANTITY – must be non-zero for pds
SECONDARY QUANTITY – provided when primary allocation is done
TOTAL EXTENDS = 16 per volume
Total units ( trks / blks / cyl ) = Primary + 15 * Secondary
According to the formula
EXAMPLE =>
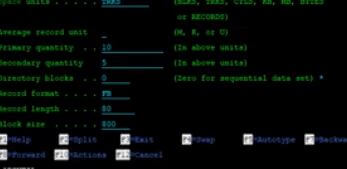
SPACE = ( TRKS , ( 10 , 5 ) ) = (1 * 10 ) + ( 15 * 5 ) à IT will occupy 85 tracks maximum
The number can vary depending upon the number of extents available in contiguous memory.
DIRECTORY BLOCK =>
Data set with ISPF statistics: 6
Data set without ISPF statistics: 21
RECORD FORMAT =>
F – Fixed – length records.
FB – Fixed Blocks
V – Variable – length
VB – Variable – length block
RECORD LENGTH =>
Logical record length, in bytes, of record to be stored in the data set
BLOCK SIZE =>
Block size also known as physical record length. We use this field to specify how many bytes of data to put into each block, based on record length
EXAMPLE => record length is 80 and the block size is 3120, 39 records can be placed in each block.
IMPORTANT DATA SET NAME TYPE =>
LIBRARY – allocate partitioned data set extended
PDS – allocate partitioned data set
LARGE – allocate a large format sequential data set
BLANK – allocate a partitioned or sequential data set based on the data set characteristics entered.
