Blue Ocean: Jenkins
Blue Ocean is created on the basis of the user’s Jenkins experience. It is mainly designed for the pipeline process, but it can also perform freestyle jobs. Blue Ocean reduces the disorder and chaos caused by the Jenkins and also increases the clarity for each team member.
Blue Ocean is very useful for a fully skilled user who knows Jenkins features very well. Still, if you are a beginner, you may need to know Jenkins’s basics, especially about Jenkin’s pipeline process. The name Blue Ocean is taken from the book >> “Blue Ocean Strategy.”
>> Blue Ocean supports the Jenkins version 2.7 and its later version also.
Main features of Blue Ocean
- Supports freestyle jobs: Although it is designed for the pipeline process, it also supports freestyle jobs. Even you can run a single job on it.
- Personalization: Blue Ocean performs in a personalized way. Each member of the team can easily visualize the execution and modification made in the builds.
- Pinpoint precision: Whenever any problem arises or any interference is required in the pipeline process, and Blue Ocean points out the exact location where the bug has arisen and where you can make attention in the pipeline.
- Pipeline editor: Blue Ocean makes it easy to create a pipeline by giving guidance to the user via some instructions and visual representation.
- Open source: The blue ocean is open source; you are able to make changes as per your requirements.
- Free of cost: The blue ocean is totally free of cost. It comes as a plugin in the Jenkins, and you can download it from the manage Jenkins section.
How to use
The Blue Ocean can be installed in 2 ways:
- By using Jenkins plugins
- As part of Jenkins by using Docker.
By using the Jenkins plugin
To install the Blue Ocean in the Jenkins, you must use the Jenkins 2.7.x version or its upper version.
The use of the Blue Ocean is very easy. If you have the Jenkins tool in your system and a proper network connection, you will be able to use the Blue Ocean within 10 minutes. Follow the given steps to use the Blue Ocean:
Step 1:
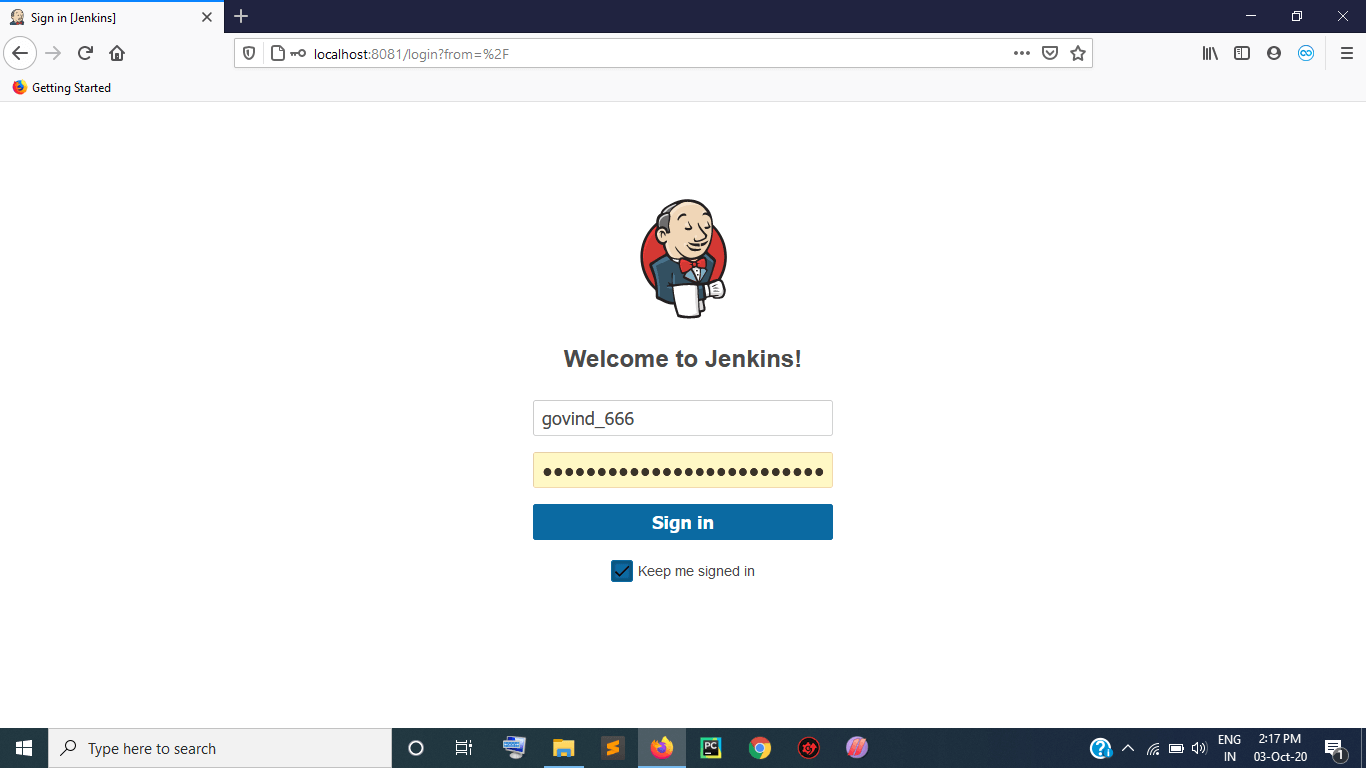
Firstly, log in to the Jenkins tool by using your administrator User ID and password.
Step 2:
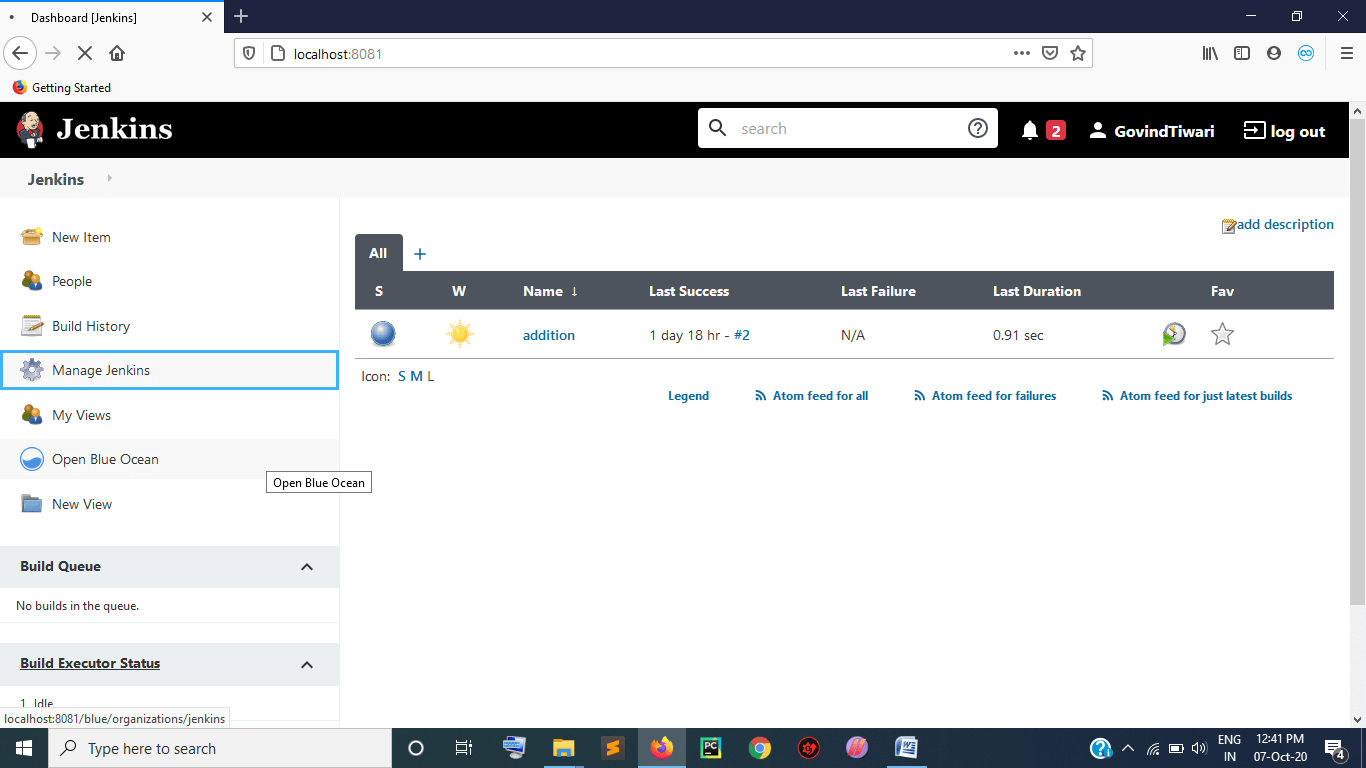
From the dashboard, select the “Manage Jenkins” option, which is available on the left panel of the dashboard.
Step 3:
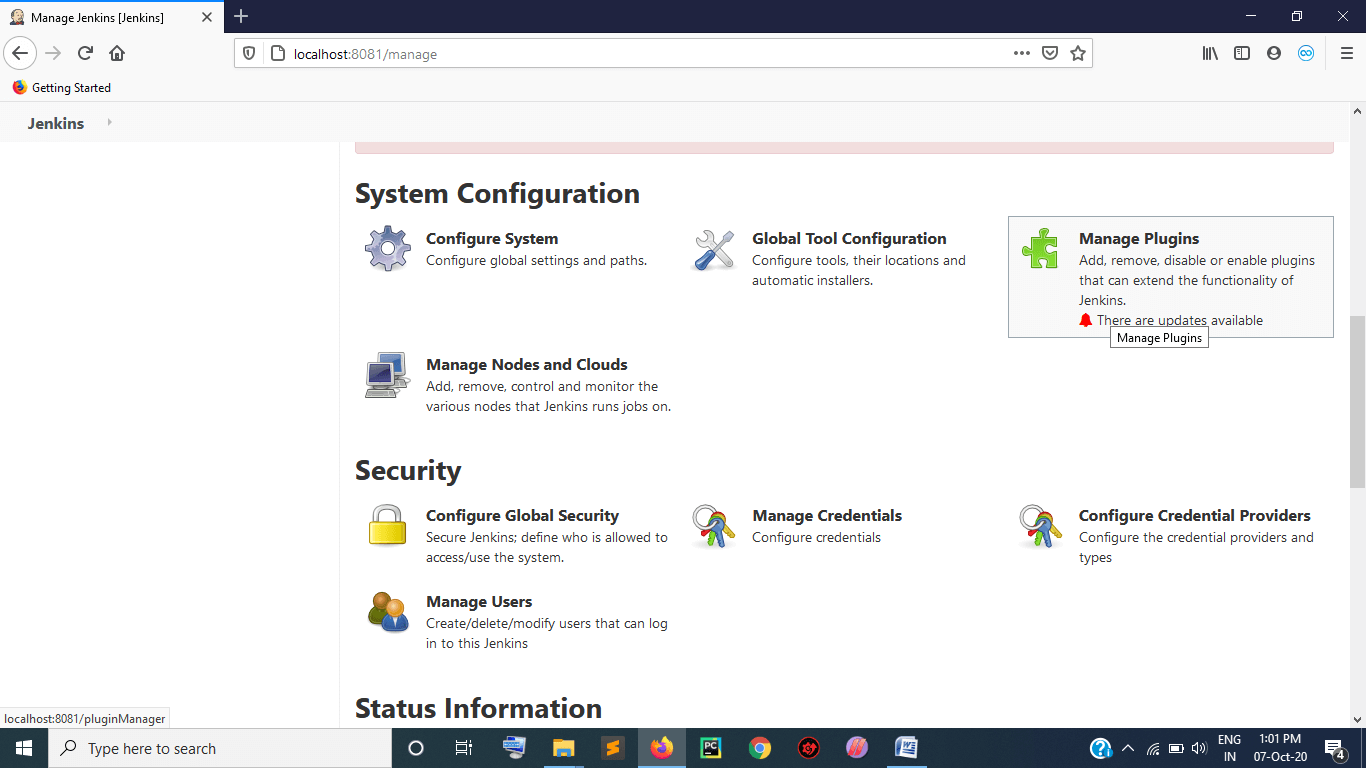
It will take you to the Manage Jenkins page. As you can see in the displayed image, it has many options, and you have to select the “Manage Plugin” option.
Step 4:
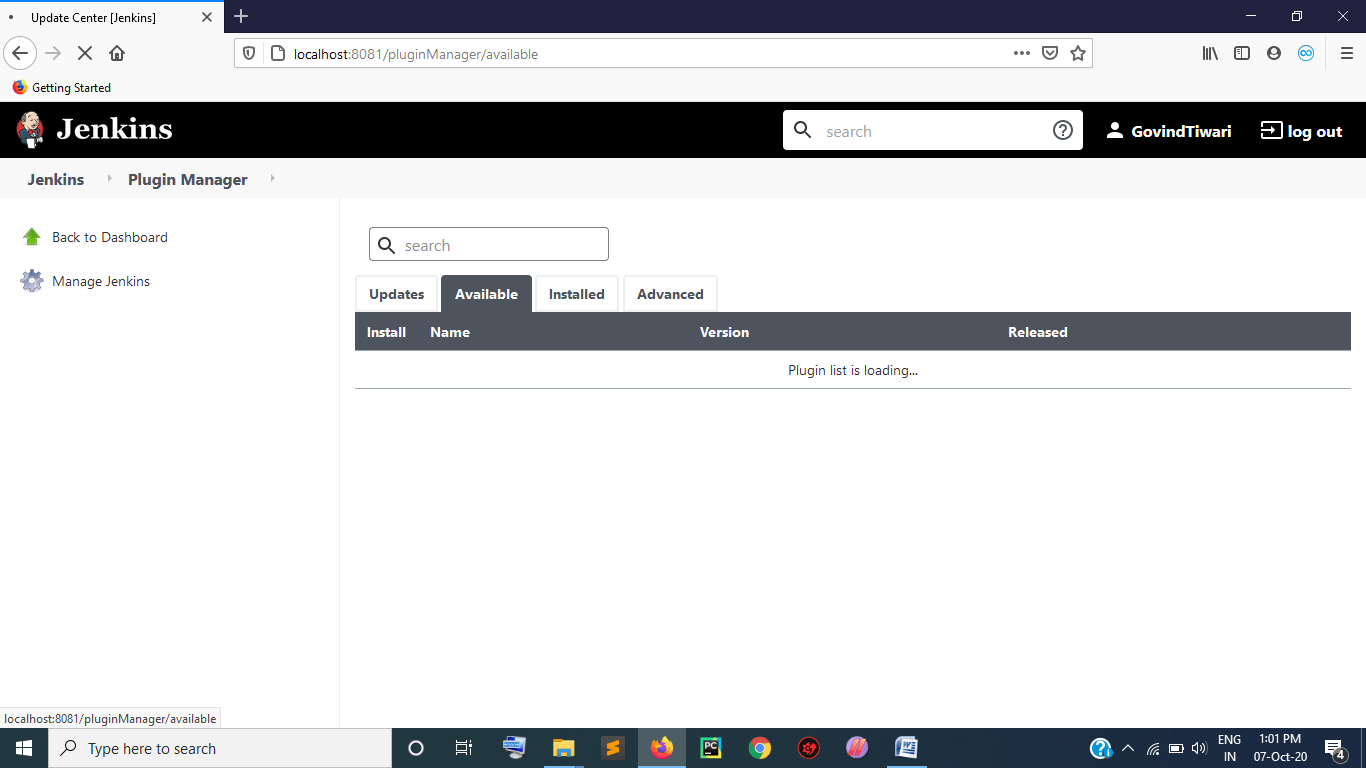
Once you click on “Manage Jenkins,” it will take you to the page where you will find the following sections:
- Update
- Available
- Install
- Advance
Choose the 2nd (Available) section.
Step 5:
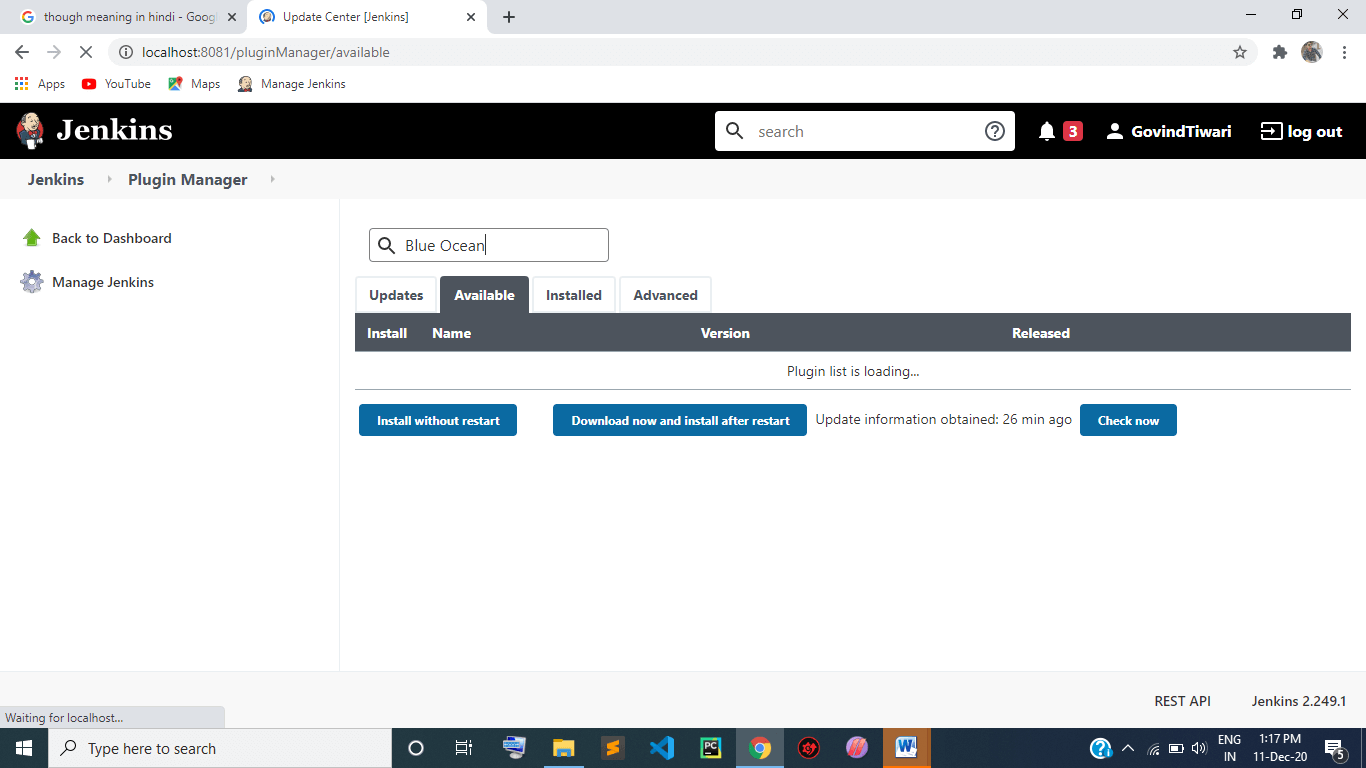
Click on the search bar and type “Blue Ocean” to get the blue ocean plugin.
Step 6:
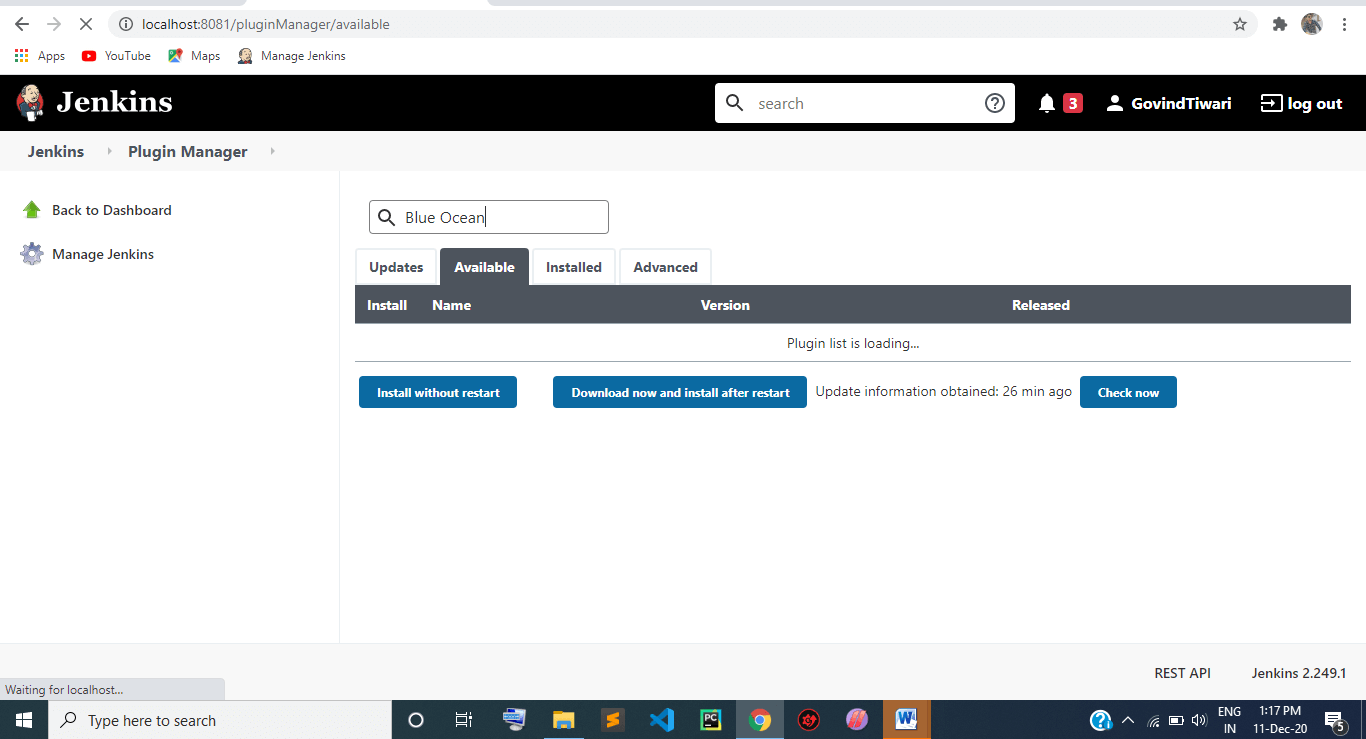
When you search for “Blue Ocean,” you will find it at the top of the search result. Click on the check box available in the install column, exactly in the front of the Blue Ocean plugin.
Step 7:
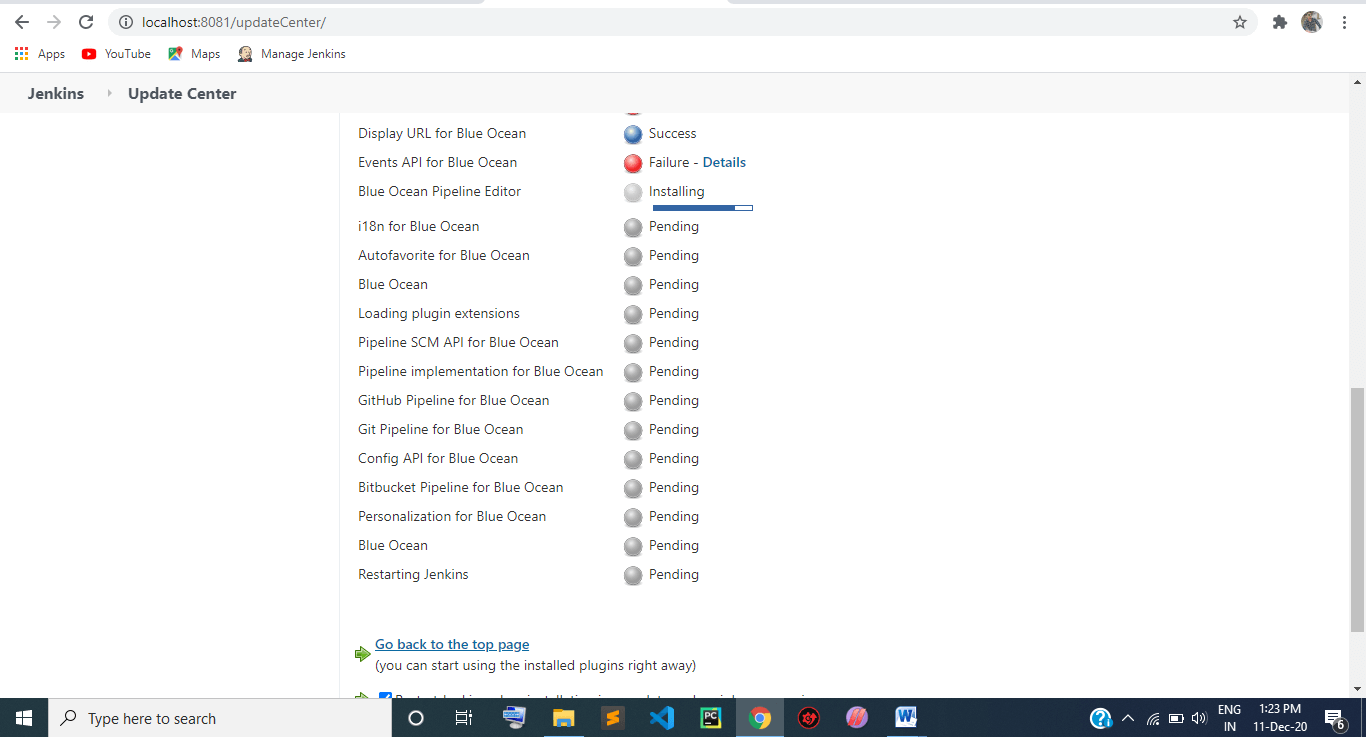
Now install the plugin. You can choose one of the options >> either “Install without restart” or “Download now and install after restart.” Once you click on either option, it will redirect you to a new page, where the installation process will begin. Here it will download the plugins and their related upgrades. It will take some time to download. When the download is completed, the status of the plugin is converted from pending to success.
Step 8:
Now your Blue Ocean is downloaded and is ready to use. You can restart your Jenkins to work properly. After completing all the installation process, you can easily use the Blue Ocean by clicking the “Open Blue Ocean” tab, available on the top navigation bar of the Jenkins web UI.
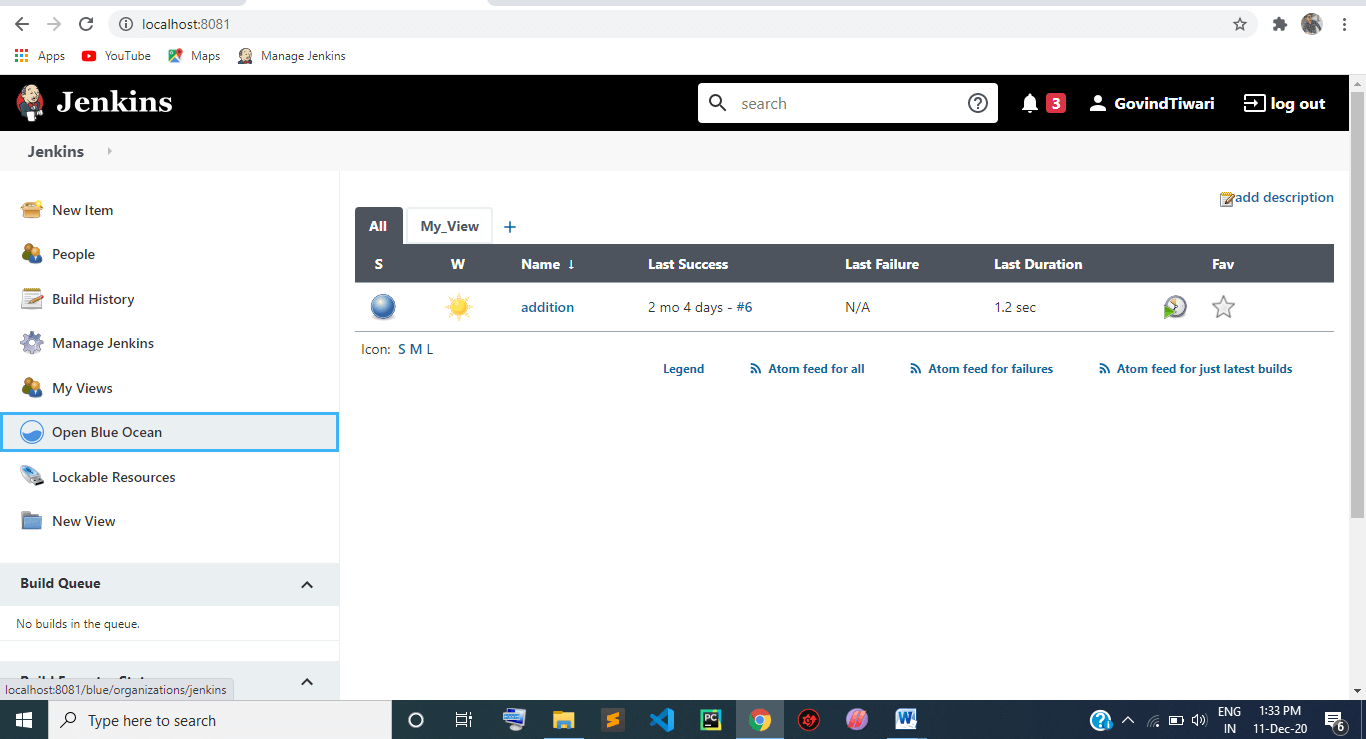
However, you can also directly access the Blue Ocean by adding <strong>/blue</strong> into your Jenkins URL, like
If you want to go back to your Jenkins web UI while using the Blue Ocean, click on the “exit” icon, available at the top of every page.


