Hello guys.
Today we’ll talk about how to protect your binary code or dlls from being reflected. This post covers the protection of dll files generated by visual studio.

What is Reflection
For those who don’t know what reflection is, it’s the process of generating or extracting the source code of a managed dll file. There are many software’s used for reflection like Red gate, ilSpy, dotPeek from jetBrains and many more.
Types of DLL
There are two types of dll:
- Managed
- Unmanaged
Managed code is what Visual Basic .NET and C# compilers create. It compiles your code to Intermediate Language (IL) and not to machine code which can be run directly on your computer. The IL is kept in a file called an assembly along with metadata that describes the classes, methods, and attributes (such as security requirements) of the code you’ve created.
Unmanaged code is what used to be compiled before Visual Studio .NET 2002 was released. Visual Basic 6, Visual C++ 6, heck even that 15-year old C compiler you may still have kicking around on your hard drive all produced unmanaged code. This is translated to a machine low level language.
How to Protect Your Code
In order to protect your code from reflection, we will use tools or scripts related to a technology called “obfuscation”. Obfuscation is the process of creating source or machine code that is difficult for humans to understand. Actually, we will just decrypt the source code to an unreadable language. Only a machine will be able to understand or reformulate this language and execute your code. One of the examples is to change function names from a readable name to something like “__g32(…)”. Therefore, a person will not be able to comprehend the methods and their content will be unavailable. Moreover, another reason for using this tool is to hide the constants or passwords or any other critical information needed inside your classes.
Using Visual Studio
For visual studio we use a tool called “ConfuserEx”. You can download the tool under this link. For documentation or source code, please check the github link. After downloading the files, we will first need to configure our projects in order to use the ConfuserEx.
Add Configuration Files
For each project which needs to be configured, we need to add a new file named “confuser.crproj”. This file will contain xml data configuration like the below. I use the below for my projects and they work perfectly.
<project outputDir="{OutputDir}" baseDir="{BaseDir}" xmlns="http://confuser.codeplex.com">
  <module path="{TargetFileName}">
    <rule pattern="true" preset="aggressive" inherit="false">
      <protection id="anti ildasm" />
      <protection id="anti tamper" />
      <protection id="constants" />
      <protection id="rename">
        <argument name="mode" value="unicode" />
      </protection>
      <protection id="ctrl flow">
        <argument name="type" value="switch" />
      </protection>
    </rule>
  </module>
</project>
In the configuration file, we need to add rules on how and what needs to be protected within our code.
This free open source tool supports:
- Symbol renaming
- WPF/BAML renaming
- Control flow obfuscation
- Method reference hiding
- Anti debuggers/profilers
- Anti memory dumping
- Anti tampering (method encryption)
- Embedding dependency
- Constant encryption
- Resource encryption
- Compressing output
- Extensible plugin API
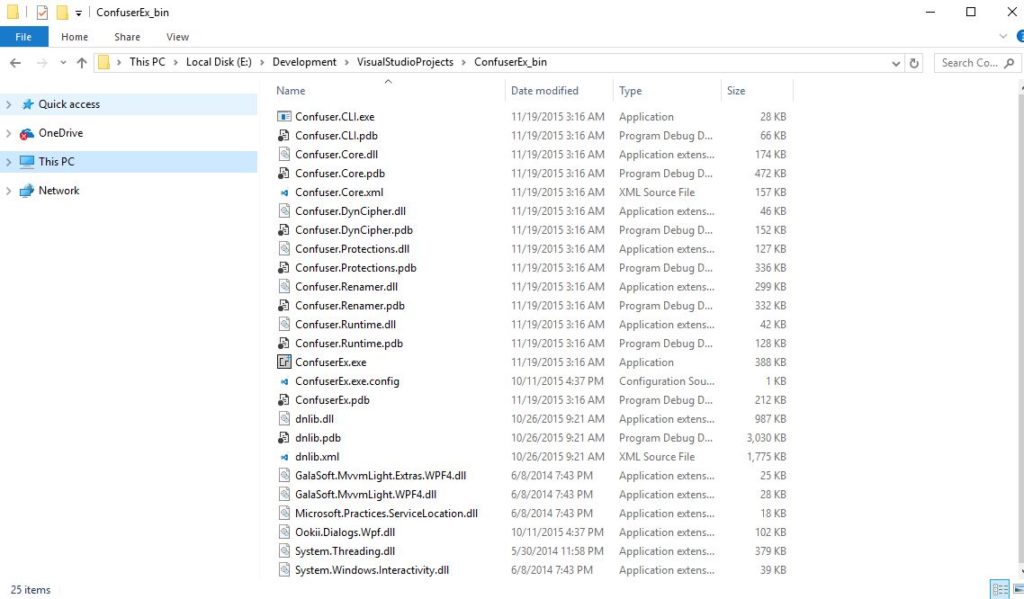
Download the Confuser
The ConfuserEx is a free open source tool. You can download the release from this github link. After that, extract the files and place them in a general directory which can be accessed from all your projects.
Creating a Script File
We need to create a powershell script file which will also be placed in a general location which is accessible by all your projects. The file will protect the output of your projects on build events. Therefore, once you build your project the script will be executed and will update the dll’s.
Therefore, create a file called “confuserps.ps1” and add the below code to it.
param (
[string]$OutputDir,
[string]$BaseDir,
[string]$TargetFileName,
[string]$ConfuserConfigurationFile
#,
#[string]$ProbePath1,
#[string]$ProbePath2
)

function replace-file-content([string] $path, [string] $replace, [string] $replaceWith)
{
(Get-Content $path) |
Foreach-Object {$_ -replace $replace,$replaceWith}|
Out-File $path
}

# Let's first copy the configuration file to a temporary directory
echo "Obfuscating..."
$tempFile = [string]::Concat($BaseDir, "confuser.temp.crproj")
echo "Copying " $ConfuserConfigurationFile " to " $tempFile
Copy-Item $ConfuserConfigurationFile -Destination $tempFile
echo "Replacing placeholders..."
replace-file-content $tempFile "{OutputDir}" "$OutputDir"
replace-file-content $tempFile "{BaseDir}" "$BaseDir"
replace-file-content $tempFile "{TargetFileName}" "$TargetFileName"
#replace-file-content $tempFile "{ProbePath1}" "$ProbePath1"
#replace-file-content $tempFile "{ProbePath2}" "$ProbePath2"
echo "Performing Obfuscation..."
start-process -wait "E:\Development\VisualStudioProjects\ConfuserEx_bin\Confuser.CLI.exe" "$tempFile"
echo "Obfuscation complete."
echo "Removing " $tempFile
Remove-Item $tempFile
echo "Done!!!"
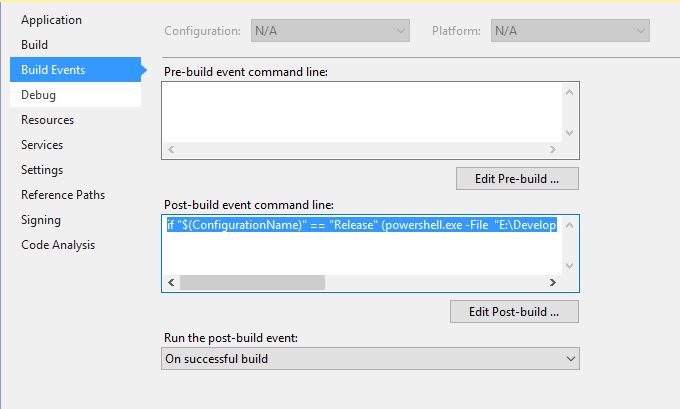
Updating Visual Studio Properties
After adding the configuration files, you will need to update some events for the build options in your project’s properties. You can define it on the release/debug mode.
if "$(ConfigurationName)" == "Release" (powershell.exe -File "E:\Development\VisualStudioProjects\confuserps.ps1" $(TargetDir) $(TargetDir) $(TargetPath) $(ProjectDir)confuser.crproj)
You should add this line to the “Post-build” event:
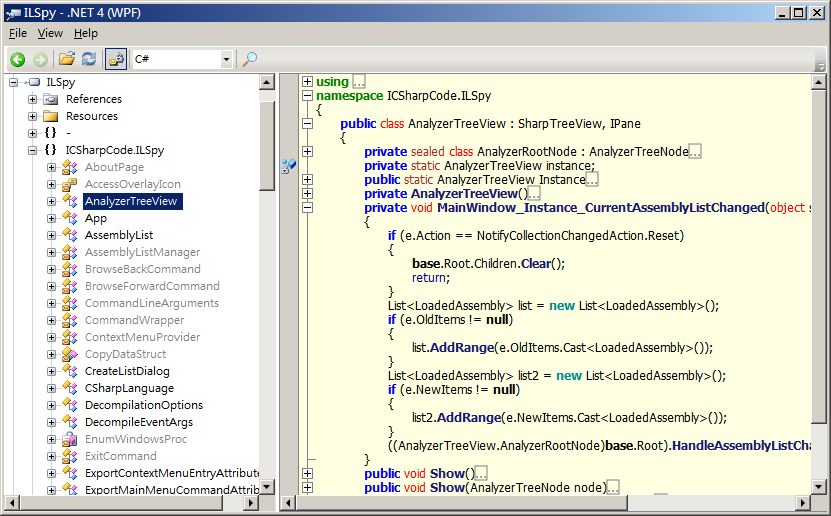
Before Protection
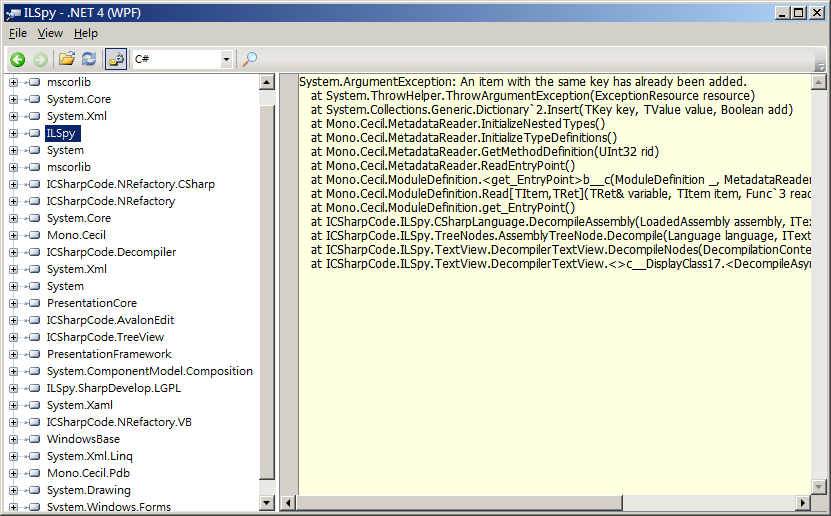
After Protection
Finally
Now, every time you build a project for release it will execute the powershell script which will protect your code from being reflected. Just an important note, don’t exaggerate by adding a lot of protection rules or you will end up with a non-working dll 😛
Stay tuned for the next post 🙂