PHP

★ My current setup (end 2021 edition)

[AdSense-A]

My current setup (end 2021 edition)

After tweeting out a screenshot, it often get questions around which editor, font or color scheme I'm using. Instead of replying to those questions individually I've decided to just write down the settings and apps that I'm using.

IDE

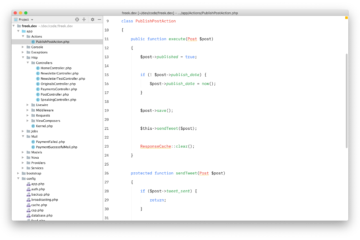
I mainly program PHP. Mostly I develop in PhpStorm. Here's a screenshot of it:

I'm using phpstorm-light-lite-theme which was handcrafted by my colleague Brent. The font used is Menlo.

Like seen in the screenshot I've hidden a lot of things of the UI of PhpStorm. I like to keep it minimal.
I like working using a light based theme. In some circles this is maybe a bit controversial. Watch this excellent video by my colleague Brent to learn what the benefits of using a light based theme are.

Mostly I work on Laravel projects. One of my favourite PhpStorm extensions is Laravel Idea, which can do stuff like autocomplete route names, request fields, and a whole lot more. It's paid, but definitely worth it.

Another PhpStorm plugin that I use is the Pest Plugin. It makes Pest a first class citizen in the IDE. This one is free.

Terminal

Here's a screenshot from my terminal.

All my terminal settings are saved in my dotfiles repository. If you want the same environment you follow the installation instructions of the repo.

My terminal of choice is iTerm2. I'm using the Z shell and Oh My Zsh.

The color scheme used is a slightly modified version of Solarized Dark. The font used is a patched version of Menlo. I'm using several hand crafted aliases and functions.

MacOS

I'm a day one upgrader of MacOS, so I'm always using the latest version. I also sometimes dare to use beta versions of MacOS when people are saying it's stable enough.

By default I hide the menu bar and dock. I like to keep my desktop ultra clean, even hard disks aren't allowed to be displayed there. On my dock there aren't any sticky programs. Only apps that are running are on there. I only have a stacks to Downloads and Desktop permanently on there. Here's a screenshot where I've deliberately moved my pointer down so the dock is shown.

I've also hidden the indicator for running apps (that dot underneath each app), because if it's on my dock it's running.

In my dotfiles repo you'll find my custom MacOS settings.

The spacey background I'm using was the default one on OSX 10.6 Snow Leopard. If you would like to use a class OSX background to, head over to this page at 512pixels.net.

These are some of the apps I'm using:

To run projects locally I use Laravel Valet.
I couldn't live without Alfred. I'm using several workflows. First up is syn and assoc by Sebastian De Deyne, to help with naming things. phpstorm by bchatard to easily open recent PhpStorm projects. Last by not least I use the Laravel docs workflow by Till Krüss to easily search the Laravel docs.
To connect to S3, ftp (?) and sftp servers I use Transmit.
Local mail testing is done with Nodemailer. This handly little app install a local mailserver. In the apps you develop locally you can use that webserver to send mails. You can inspect all sent mails in Nodemailers beautiful, native UI.
Sometimes I need to run an arbitrary piece of PHP code. CodeRunner is an excellent app to do just that.

Paw is an amazing app to perform API calls.
I use BetterTouchTool to quickly resize windows quarter, half and full screen.
Databases are managed with TablePlus

My favourite cloud storage solution is Dropbox. All my personal documents are on there and at Spatie we use it extensively too.
If you're not using a password manager, you're doing it wrong. I use 1Password. Personal passwords are sync in a vault stored on Dropbox. For Spatie we have a team account.
All settings of my apps are backupped to Dropbox through Mackup. This is a fantastic piece of software that moves all your preferences to Dropbox and symlinks them.
I don't use Time Machine, my backups are handled with Backblaze.
Tweets are tweeted with Tweetbot.
I read a lot of blogs through RSS feeds in Reeder.
Mails are read and written in Mimestream. Unlike other email clients which rely on IMAP, Mimestream uses the full Gmail API. It super fast, and the author is dedicated using the latest stuff in MacOS. It's a magnificent app really.
My browser of choice is Safari, because of its speed and low power use. To block ads on certain sites I use the AdGuard plugin.
I like to write long blogposts in iA Writer

Calendars are managed in Fantastical 2

To create videos I use ScreenFlow.
I regularly stream stuff on YouTube. For that I use Ecamm Live

To pair program with anyone in my team, I use Tuple. The quality of the shared screen and sound is fantastic.
Even though I'm not a designer I sometimes have to edit images. For this I use Pixelmator.

GrandPerspective is a hidden gem that helps you determine how your disk space is being use used.
Outside of programming, I also record music. My DAW of choice is Ableton, I'm using the complete edition.

iOS

Here's a screenshot of my current homescreen.

I don't use folders and try to keep the number of installed apps to a minimum. There's also just one screen with apps, all the other apps are opened via search. Most of my time is spent in Safari, Pocket, Reeder and Tweetbot. Notifications and notification badges are turned off for all apps except Messages.

Here's a rundown of some of the apps currently on the homescreen:

1Password: my favourite password manager
Air Video HD: I find it much more reliable to sync videos to this one the stock Videos app. No iTunes needed.
Overcast: an excellent podcast client
Telegram: most of my geeky friends are on there
iA writer: to quickly write some stuff or take notes on the go
Clock: tick, tock, ...
Stripe: to quickly check how Flare and Oh Dear are doing financially
Mobile: horribly named, this the mobile banking app of my bank
Reeder: an RSS client
Slack: for communicating with my team and some other communities
Letterboxd: a pretty imdb. I use it to log every movie I watch
Railer: to easily look up the train schedules in Belgium
Pocket: my favourite read later service
Things: contains my to dos
Nuki: this controls the electronic doorlock at our office

There's no other screens setup. I use the App Library to hunt down any app I want to use that isn't on the home screen.

Hardware

Here's a picture of the desk I have at home.

Behind my desk there's a Hue Light Strip. When working in the evening, I like to set it to a moody color.

.

And this is how things look like when I stream.

.

I'm using a MacBook Pro 14" with an Apple M1 Pro processor, 16GB of RAM and 1T hard disk.

I usually work in closed-display mode. To save some desk space, I use a beautiful vertical Mac stand: the Twelve South BookArc.

Here's the hardware that is on my desk

a space grey wireless Apple Magic Keyboard with numeric keys
a space grey Apple Magic Trackpad 2
an LG 32UK550-B external monitor
a Livboj Wireless charger

two Elegato Air lights. These make a tremedous difference in quality when streaming
a Sure SM7B mic

a Rode PSA1 boom arm

when streaming, I use a Streamdeck to quickly switch scenes in Ecamm Live.

As a webcam I use a Sony a6400 camera with a Sigma 16mm 1.4 lens. It is connected to my computer via an Elgato Cam Link 4K. The camera also mounted on a Roda PSA1 boom arm, and when I'm not using it, the camera is behind my monitor.

To connect all external hardware to my MacBook I got a CalDigit TS3 plus. This allows me to connect the webcam / mic / USB Piano keyboard, and more to my MacBook with a single USB-C cable. That cable also charges the MacBook. Less clutter on the desktop, means I have more headspace, so I'm pretty happy with the TS3 plus.

I play music on a HomePod stereo pair. To stay in "the zone" when commuting and at the office I put on my QuietComfort 35 wireless headphones.

My current phone is an iPhone 13 Pro Max with 128 GB of storage.

Misc

At Spatie, we use Google Workspace to handle mail and calendars
High level planning at the company is done using Float

All servers I work on are provisioned by Forge.
The performance and uptime of those servers are monitored via Oh Dear.
To track exceptions in production, we use Flare

To send mails to our audience that is interested in our paid products, we use our homegrown Mailcoach.

If you want to know some more tools we use at Spatie, go over to the uses page on our company website.

In closing

Every year, I write a new version of the post. Here's the 2020 version.

If you have any questions on any of these apps and services, feel free to contact me on Twitter.

(more…)

By , ago
PHP

★ Avoid describing your data multiple times in a Laravel app using laravel-data

[AdSense-A]

In the vast majority of applications you work with data structures. Sometimes that data is described multiple times. Think for instance of a form request that tries to validate a blog post model, and an API transformer class for that same blog post model. Changes are that both classes describe the same properties.

Using our new laravel-data package, those structures only need to be described once.

Instead of form requests, you can use a data object. Instead of API transformers, you can use a data object. Instead of manually writing typescript definitions, you can use... 🥁 a data object

In this blog post, I'll guide you through the most important functionalities of the package and how to use them.

Getting started

First, you should install the package.

We're going to create a blog with different posts so let's get started with the PostData object. A post has a title, some content, a status and a date when it was published:

class PostData extends Data
{
public function __construct(
public string $title,
public string $content,
public PostStatus $status,
public ?CarbonImmutable $published_at
) {
}
}

The only requirement for using the package is extending your data objects from the base Data object. We add the requirements for a post as public properties.

The PostStatus is an enum using the spatie/enum package:

/**
* @method static self draft()
* @method static self published()
* @method static self archived()
*/
class PostStatus extends Enum
{

}

We store this PostData object as app/Data/PostData.php, so we have all our data objects bundled in one directory. Of course, you're free to store them wherever you want within your application.

We can now create this a PostData object just like any plain PHP object:

$post = new PostData(
'Hello laravel-data',
'This is an introduction post for the new package',
PostStatus::published(),
CarbonImmutable::now()
);

The package also allows you to create these data objects from any type, for example, an array:

$post = PostData::from([
'title' => 'Hello laravel-data',
'content' => 'This is an introduction post for the new package',
'status' => PostStatus::published(),
'published_at' => CarbonImmutable::now(),
]);

Using requests and casts

Now let's say we have request with these properties. Our controller would then look like
this:

public function __invoke(Request $request)
{
$post = PostData::from([
'title' => $request->input('title'),
'content' => $request->input('content'),
'status' => PostStatus::from($request->input('status')),
'published_at' => CarbonImmutable::createFromFormat(DATE_ATOM, $request->input('published_at')),
]);
}

That's a lot of code just to fill a data object. It would be a lot nicer if we could do this:

public function __invoke(Request $request)
{
$post = PostData::from($request);
}

But this throws the following exception:

TypeError: AppDataPostData::__construct(): Argument #3 ($status) must be of type AppEnumsPostStatus, string given

That's because the status property expects a PostStatus enum object, but it gets a string. We can fix this by implementing a cast for enums:

class PostStatusCast implements Cast
{
public function cast(DataProperty $property, mixed $value): PostStatus
{
return PostStatus::from($value);
}
}

And tell the package always to use this cast when trying to create a PostData object:

class PostData extends Data
{
public function __construct(
public string $title,
public string $content,
#[WithCast(PostStatusCast::class)]
public PostStatus $status,
public ?CarbonImmutable $published_at
) {
}
}

Using global casts

Let's send the following payload to the controller:

{
"title" : "Hello laravel-data",
"content" : "This is an introduction post for the new package",
"status" : "published",
"published_at" : "2021-09-24T13:31:20+00:00"
}

We get the PostData object populated with the values in the JSON payload, neat! But how did the package convert the published_at string into a CarbonImmutable object?

It is possible to define global casts within the data.php config file. These casts will be used on data objects if no other casts can be found.

By default, the global casts list looks like this:

'casts' => [
DateTimeInterface::class => SpatieLaravelDataCastsDateTimeInterfaceCast::class,
],

This means that if a class property is of type DateTime, Carbon, CarbonImmutable, ... it will be automatically converted.

You can read more about casting here.

Validation using form requests

Since we're working with requests, wouldn't it be cool to validate the data coming in from the request using the data object? Typically, you would create a request with a validator like this:

class PostDataRequest extends FormRequest
{
public function authorize()
{
return false;
}

public function rules()
{
return [
'title' => ['required', 'string', 'max:200'],
'content' => ['required', 'string'],
'status' => ['required', 'string', 'in:draft,published,archived'],
'published_at' => ['nullable', 'date']
];
}
}

Thanks to PHP 8.0 attributes, we can completely omit this PostDataRequest and use the data object instead:

class PostData extends Data
{
public function __construct(
#[Required, StringType, Max(200)]
public string $title,
#[Required, StringType]
public string $content,
#[Required, StringType, In(['draft', 'published', 'archived'])]
public PostStatus $status,
#[Nullable, Date]
public ?CarbonImmutable $published_at
) {
}
}

You can now inject the data object into your application, just like a Laravel form request:

public function __invoke(PostData $data)
{
dd($data); // a filled in data object
}

When the given data is invalid, a user will be redirected back with the validation errors in the error bag. If a validation occurs when making a JSON request, a 422 response will be returned with the validation errors.

Because our data object is so well-typed, we can even drop some validation rules since they can be automatically deduced:

class PostData extends Data
{
public function __construct(
#[Max(200)]
public string $title,
public string $content,
#[StringType, In(['draft', 'published', 'archived'])]
public PostStatus $status,
#[Date]
public ?CarbonImmutable $published_at
) {
}
}

There's still much more you can do with validating data objects. Read more about it here.

Using a data object to get the request data from anywhere

Typically, you would use a controller to get the request data, and pass it to objects that need that data.

There's also another pragmatic way to get to the request data: you can resolve a data object from the container:

app(PostData::class);

The returned PostData instance will be filled with data from the request. If for some reason the request data could not be mapped upon the data object (maybe validation failed), than the package will throw a IlluminateValidationValidationException.

In most cases, you won't need this, but it's cool that you can.

Working with Eloquent models

In our application, we have a Post Eloquent model:

class Post extends Model
{
protected $fillable = '*';

protected $casts = [
'status' => PostStatus::class
];

protected $dates = [
'published_at'
];
}

Thanks to the casts we added earlier, this can be quickly transformed into a PostData object:

PostData::from(Post::findOrFail($id));

Customizing the creation of a data object

It is even possible to manually define how such a model is mapped onto a data object. To demonstrate that, we will take a completely different example that shows the strength of the from method.

What if we would like to support to create posts via an email syntax like this:

title|status|content

Creating a PostData object would then look like this:

PostData::from('Hello laravel-data|draft|This is an introduction post for the new package');

To make this work, we need to add a magic creation function within our data class:

class PostData extends Data
{
public function __construct(
public string $title,
public string $content,
#[WithCast(PostStatusCast::class)]
public PostStatus $status,
public ?CarbonImmutable $published_at
) {
}

public static function fromString(string $post): PostData
{
$fields = explode('|', $post);

return new self(
$fields[0],
$fields[2],
PostStatus::from($fields[1]),
null
);
}
}

Magic creation methods allow you to create data objects from any type by passing them to the from method of a data
object, you can read more about it here.

It can be convenient to transform more complex models than our Post into data objects because you can decide how a model
would be mapped onto a data object.

Nesting data objects and collections

Now that we have a fully functional post data object. We're going to create a new data object, AuthorData that will store the name of an author and a collection of posts the author wrote:

class AuthorData extends Data
{
public function __construct(
public string $name,
/** @var AppDataPostData[] */
public DataCollection $posts
) {
}
}

Instead of using an array to store all the posts, we use a DataCollection. This will be very useful later on! We now can create an author object as such:

new AuthorData(
'Ruben Van Assche',
PostData::collection([
new PostData('Hello laravel-data', 'This is an introduction post for the new package', PostStatus::draft(), null),
new PostData('What is a data object', 'How does it work?', PostStatus::draft(), null),
])
);

But it is also possible to create an author using the from method:

AuthorData::from([
'name' => 'Ruben Van Assche',
'posts' => [
[
'title' => 'Hello laravel-data',
'content' => 'This is an introduction post for the new package',
'status' => 'draft',
'published_at' => null,
],
[
'title' => 'What is a data object',
'content' => 'How does it work',
'status' => 'draft',
'published_at' => null,
],
],
]);

The data object is smart enough to convert an array of posts into a data collection of post data. Mapping data coming from the frontend was never that easy!

You can do a lot more with data collections. Read more about it here.

Usage in controllers

We've been creating many data objects from all sorts of values, time to change course and go the other way around and start transforming data objects into arrays.

Let's say we have an API controller that returns a post:

public function __invoke()
{
return new PostData(
'Hello laravel-data',
'This is an introduction post for the new package',
PostStatus::published(),
CarbonImmutable::create(2020, 05, 16),
);
}

By returning a data object in a controller, it is automatically converted to JSON:

{
"title" : "Hello laravel-data",
"content" : "This is an introduction post for the new package",
"status" : "published",
"published_at" : "2021-09-24T13:31:20+00:00"
}

You can also easily convert a data object into an array as such:

$postData->toArray();

Which gives you an array like this:

[
'title' => 'Hello laravel-data',
'content' => 'This is an introduction post for the new package',
'status' => 'published',
'published_at' => '2021-09-24T13:31:20+00:00',
]

It is possible to transform a data object into an array and keep complex types like the PostStatus and CarbonImmutable:

$postData->all();

This will give the following array:

[
'title' => 'Hello laravel-data',
'content' => 'This is an introduction post for the new package',
'status' => PostStatus::published(),
'published_at' => CarbonImmutable::create(2020, 05, 16),
]

As you can see, if we transform a data object to JSON, the CarbonImmutable published at date is transformed into a string.

Using transformers

A few sections ago, we used casts to convert simple types into complex types. Transformers work the other way around. They transform complex types into simple ones and transform a data object into a simpler structure like an array or JSON.

Just like the DateTimeInterfaceCast we also have a DateTimeInterfaceTransformer that will convert DateTime, Carbon, ... objects into strings.

This DateTimeInterfaceTransformer is registered in the data.php config file and will automatically be used when a data object needs to transform a DateTimeInterface object:

'transformers' => [
DateTimeInterface::class => SpatieLaravelDataTransformersDateTimeInterfaceTransformer::class,
IlluminateContractsSupportArrayable::class => SpatieLaravelDataTransformersArrayableTransformer::class,
],

The value of the PostStatus enum is automatically transformed to a string because it implements JsonSerializable, but it is perfectly possible to write a custom transformer for it just like we built our custom cast a few sections ago:

class PostStatusTransformer implements Transformer
{
public function transform(DataProperty $property, mixed $value): string
{
/** @var AppEnumsPostStatus $value */
return $value->value;
}
}

We now can use this transformer in the data object like this:

class PostData extends Data
{
public function __construct(
public string $title,
public string $content,
#[WithTransformer(PostStatusTransformer::class)]
public PostStatus $status,
public ?CarbonImmutable $published_at
) {
}
}

You can read a lot more about transformers here.

Generating a blueprint

We now can send our posts as JSON to the front, but what if we want to create a new post? When using Inertia, for example, we might need an empty blueprint object like this that the user could fill in:

{
"title" : null,
"content" : null,
"status" : null,
"published_at" : null
}

This can be done with the empty method, which will return an empty array following the structure of your data object:

PostData::empty();

This will return the following array:

[
'title' => null,
'content' => null,
'status' => null,
'published_at' => null,
]

It is possible to set the status of the post to draft by default:

PostData::empty([
'status' => 'draft';
]);

In closing

I hope you liked this quick overview of this package. There's still a lot more you can do with data objects like:

casting them into Eloquent models

transforming the structure to typescript

working with DataCollections

If you want to know more about this package, head over to the extensive documentation.

This isn't the first package that our team has made. Our website has an open source section that lists every package that our team has made. I'm pretty sure that there's something there for your next project. Currently, all of our package combined are being downloaded 10 million times a month.

Our team doesn't only create open-source, but also paid digital products, such as Ray, Mailcoach and Flare. Our team also creates premium video courses, such as Laravel Beyond CRUD, Testing Laravel, Laravel Package Training and Event Sourcing in Laravel. If you want to support our open source efforts, consider picking up one of our paid products.

(more…)

By , ago
PHP

★ Three types of mocks

[AdSense-A]

Mocking, faking; these might sound like intimidating words if you don't know what they are about, but once you do, you'll be able to improve your testing skills significantly.

Part of "the art of testing" is being able to test code in some level of isolation to make sure a test suite is trustworthy and versatile. These topics are so important that we actually made five or six videos on them in our Testing Laravel course.

In this post, I want to share three ways how you can deal with mocking and faking. Let's dive in!

Laravel's Fakes

Laravel has seven fakes — eight if you count time as well:

Bus
Event
HTTP
Mail
Notification
Queue
Storage
Time

Laravel fakes are useful because they are built-in ways to disable some of the core parts of the framework during testing while still being able to make assertions on them. Here's an example of using the Storage fake to assert whether a file would have been saved in the correct place if the code was run for real, outside of your test suite:

Storage::fake('public');

$post = BlogPost::factory()->create();

Storage::disk('public')
->assertExists("blog/{$post->slug}.png");

Mockery

Laravel has built-in support for Mockery, a library that allows you to create mocks — fake implementations of a class — on the fly.

Here we create an example of an RssRepository, so that we won't perform an actual HTTP request, but instead return some dummy data:

$rss = $this->mock(
RssRepository::class,
function (MockInterface $mock) {
$mock
->shouldReceive('fetch')
->andReturn(collect([
new RssEntry(/* … */)
]));
}
);

You can imagine how using mocks can significantly impact the performance and reliability of your test suite.

Handcrafted mocks

Mockery can sometimes feel heavy or complex, depending on your use case. My personal preference is to use handcrafted mocks instead: a different implementation of an existing class, one that you register in Laravel's container when running tests. Here's an example:

class RssRepositoryFake extends RssRepository
{
public function fetch(string $url): Collection
{
return collect([
new RssEntry(/* … */),
]);
}

public static function setUp(): void
{
self::$urls = [];

app()->instance(
RssRepository::class,
new self(),
);
}
}

By cleverly using the service container, we can override our real RssRepository by one that doesn't actually perform any HTTP requests. If you're curious to learn more about them, you can check out our Testing Laravel course.

(more…)

By , ago
PHP

★ A Laravel package to crawl and index content of your sites

[AdSense-A]

The newly released spatie/laravel-site-search package can crawl and index the content of one or more sites. You can think of it as a private Google search for your sites. Like most Spatie packages, it is highly customizable: you have total control over what content gets crawled and indexed.

To see the package in action, head over to the search page of this very blog.

In this post, I'd like to introduce the package to you and highlight some implementation and testing details. Let's dig in!

Are you a visual learner?

In this stream on YouTube, I'll demo the package and dive into its source code. All questions are welcome in the chat.

Why we created this package?

In our ecosystem, there already are several options to create a search index. Let's compare them with our new package.

Laravel Scout is an excellent package to add search capabilities for Eloquent models. In most cases, this is very useful if you want to provide a structured search. For example, if you have a Product model, Scout can help build up a search index to search the properties of these products.

The main difference between Scout and laravel-site-search is that laravel-site-search is not tied to Eloquent models. Like Google, it will crawl your entire site and index all content that is there.

Another nice indexing option is Algolia Docsearch. It can add search capabilities to open-source documentation for free.

Our laravel-site-search package may be used to index non-open-source stuff as well. Where Docsearch makes basic assumptions on how the content is structured, our package tries to make a best effort to index all kinds of content.

You could also opt to use Meilisearch Doc Scraper, which you can use for non-open-source content. It's written in Python, so it's not that easy to integrate with a PHP app.

Our package is, of course, written in PHP and can be customized very easily; you can even add custom properties.

So summarised, our package can be used for all kinds of content, and it can be easily customized when installed in a Laravel app.

Crawling your first site

First, you must follow the installation instructions. This involves installing the package and installing Meilisearch. The docs even mention how you can install and run Meilisearch on a Forge provisioned server.

After you've installed the package, you can run this command to define a site that needs to be indexed.

php artisan site-search:create-index

This command will ask for a name for your index and the URL of your site that should be crawled. Of course, you could run that command multiple times to create multiple indexes.

After that, you should run this command to start a queued job. You should probably schedule that command to run every couple of hours so that the index is kept in sync with your site's latest content.

php artisan site-search:crawl

That job that is started by that command will:

create a new Meilisearch index
crawl your website using multiple concurrent connections to improve performance
transform crawled content to something that can be put in the search index
mark that new Meilisearch index as the active one
delete the old Meilisearch index

Finally, you can use Search to perform a query on your index.

use SpatieSiteSearchSearch;

$searchResults = Search::onIndex($indexName)
->query('your query')
->get();

This is how you could render the results in a Blade view:

<ul>
@foreach($searchResults->hits as $hit)
<li>
<a href="{{ $hit->url }}">
<div>{{ $hit->url }}</div>
<div>{{ $hit->title() }}</div>
<div>{!! $hit->highlightedSnippet() !!}</div>
</a>
</li>
@endforeach
</ul>

That is basically how you can use the package. On the search page of this very blog, you can see the package in action. I've also open-sourced my blog, so on GitHub, you'll be able to see the Livewire component and Blade view that power the search page.

Customizing what gets crawled and indexed

In most cases, you don't want to index all content that is available on your site. A few examples of this are menu structures or list pages (e.g. a list with blog posts with links to the detail pages of those posts).

We've made it easy to ignore such content. In the config file there's an option ignore_content_on_urls. Your homepage probably contains no unique content but rather links to pages where the full content is.

You can ignore the content on the homepage by adding /. We'll still crawl the homepage but not put any of its content in the index.

/*
* When crawling your site, we will ignore content that is on these URLs.
*
* All links on these URLs will still be followed and crawled.
*
* You may use `*` as a wildcard.
*/
'ignore_content_on_urls' => [
'/'
],

You can also ignore content based on CSS selectors. There's an option ignore_content_by_css_selector in the config file that lets you specify any CSS selection.

If your menu structure is in a nav element, you can add nav. You could also introduce a data attribute that you could slap on any content you don't want in your index.

So with this configuration:

/*
* When indexing your site, we will ignore any content to the search index
* that is selected by these CSS selectors.
*
* All links inside such content will still be crawled, so it's safe
* it's safe to add a selector for your menu structure.
*/
'ignore_content_by_css_selector' => [
'nav',
'[data-no-index]',
],

... this div won't get indexed:

<div>
This will get indexed
</div>
<div data-no-index>
This won't get indexed but <a href="/other-page">this link</a> will still be followed.
</div>

Using a search profile

For a lot of users, the above config options will be enough. If you want to control what gets indexed and crawled programmatically, you can use a search profile.

A search profile determines which pages get crawled and what content gets indexed. In the site-search config file, you'll win the default_profile key that the SpatieSiteSearchProfilesDefaultSearchProfile::class is being use by default.

This default profile will instruct the indexing process:

to crawl each page of your site
to only index any page that had 200 as the status code of its response
to not index a page if the response had a header site-search-do-not-index

By default, the crawling process will respect the robots.txt of your site.

If you want to customize the crawling and indexing behaviour, you could opt to extend SpatieSiteSearchProfilesDefaultSearchProfile or create your own class that implements the SpatieSiteSearchProfilesSearchProfile interface. This is how that interface looks like.

namespace SpatieSiteSearchProfiles;

use PsrHttpMessageResponseInterface;
use PsrHttpMessageUriInterface;
use SpatieSiteSearchIndexersIndexer;

interface SearchProfile
{
public function shouldCrawl(UriInterface $url, ResponseInterface $response): bool;
public function shouldIndex(UriInterface $url, ResponseInterface $response): bool;
public function useIndexer(UriInterface $url, ResponseInterface $response): ?Indexer;
public function configureCrawler(Crawler $crawler): void;
}

Indexing extra properties

Only the page title, URL, description, and some content are added to the search index by default. However, you can add any extra property you want.

You do this by using a custom indexer and override the extra method.

class YourIndexer extends SpatieSiteSearchIndexersDefaultIndexer
{
public function extra() : array{
return [
'authorName' => $this->functionThatExtractsAuthorName()
]
}

public function functionThatExtractsAuthorName()
{
// add logic here to extract the username using
// the `$response` property that's set on this class
}
}

The extra properties will be available on a search result hit.

$searchResults = SearchIndexQuery::onIndex('my-index')->search('your query')->get();

$firstHit = $searchResults->hits->first();

$firstHit->authorName; // returns the author name

Let's take a look at the tests

When writing tests, I usually prefer to write feature tests. They give me the highest confidence that everything is working correctly.

In the case of this package, a proper feature test would encompass crawling and indexing a site, then perform a query to the built-up search index, and verify if the results are correct.

In our test suite, we do precisely that. Let's first take a look at the test itself.

it('can crawl and index all pages', function () {
Server::activateRoutes('chain');

dispatch(new CrawlSiteJob($this->siteSearchConfig));

waitForMeilisearch($this->siteSearchConfig);

$searchResults = Search::onIndex($this->siteSearchConfig->name)
->query('here')
->get();

expect(hitUrls($searchResults))->toEqual([
'http://localhost:8181/',
'http://localhost:8181/2',
'http://localhost:8181/3',
]);
});

The site that we're going to crawl is not a real site. The used crawl_url in $this->siteSearchConfig is set to localhost:8181. This site is served by a Lumen application, that is booted whenever the tests run.

The first line of our test is Server::activateRoutes('chain'). This will make our Lumen application load and use a certain routes file. In this case, we will let our Lumen app use the chain.php routes file. This is what that routes file looks like:

$router->get('/', fn () => view('chain/1'));
$router->get('2', fn () => view('chain/2'));
$router->get('3', fn () => view('chain/3'));

So basically, our Lumen app now is a mini-site that serves a couple of chained pages.

In the following lines of our test, we're dispatching the job that will crawl and indexed that site.


// in our test

dispatch(new CrawlSiteJob($this->siteSearchConfig));

waitForMeilisearch($this->siteSearchConfig);

That waitForMeilisearch also deserves a bit of explanation. When something is being saved in a Meilisearch index, that bit of info won't be indexed immediately. Meilisearch needs a bit of time to process everything. Our tests need to wait on that because otherwise, our test may randomly fail because sometimes our exceptions would run before the indexing is complete.

Luckily, Meilisearch has an API that can determine whether all updates to an index are processed. Here's the implementation of waitForMeilisearch. We simply wait for Meilisearch's processing to be done.

function waitForMeilisearch(SiteSearchConfig $siteSearchConfig): void
{
$indexName = $siteSearchConfig->refresh()->index_name;

while (MeiliSearchDriver::make($siteSearchConfig)->isProcessing($indexName)) {
sleep(1);
}
}

After Meilisearch has done its work, we will perform a query against the Meilisearch index and expect certain URLs to be returned.

// in our test

$searchResults = Search::onIndex($this->siteSearchConfig->name)
->query('here')
->get();

expect(hitUrls($searchResults))->toEqual([
'http://localhost:8181/',
'http://localhost:8181/2',
'http://localhost:8181/3',
]);

With that Lumen test server a waitForMeilisearch function, we can test most functionalities of the package. Here's the test that makes sure the ignore_content_on_urls option is working.

When crawling the same chain as above but add ignore_content_on_urls to the pages to ignore, we expect that / and /3 are in the index.

it('can be configured not to index certain urls', function () {
Server::activateRoutes('chain');

config()->set('site-search.ignore_content_on_urls', [
'/2',
]);

dispatch(new CrawlSiteJob($this->siteSearchConfig));

waitForMeilisearch($this->siteSearchConfig);

$searchResults = Search::onIndex($this->siteSearchConfig->name)
->query('here')
->get();

expect(hitUrls($searchResults))->toEqual([
'http://localhost:8181/',
'http://localhost:8181/3',
]);
});

This kind of test gives me a lot of confidence that everything in the package is working correctly. If you want to see more tests, head over to the test suite on GitHub.

In closing

I hope that you like this little tour of the package. There are a lot of options not mentioned in this blog post: You can create synonyms, extra properties can be added, and much more.

We spent a lot of time making every aspect of the crawling and indexing behaviour customizable. Discover all the options in our extensive docs.

This isn't the first package that our team has made. Our website has an open source section that lists every package that our team has made. I'm pretty sure that there's something there for your next project. Currently, all of our package combined are being downloaded 10 million times a month.

Our team doesn't only create open-source, but also paid digital products, such as Ray, Mailcoach and Flare. Our team also creates premium video courses, such as Laravel Beyond CRUD, Testing Laravel, Laravel Package Training and Event Sourcing in Laravel. If you want to support our open source efforts, consider picking up one of our paid products.

(more…)

By , ago