There are lots of fun Python snippets out there that you can use to convert your photos into ASCII art. Anthony Shaw, an author, and contributor at Real Python, has his own snippet on GitHub. Most of these small programs use the Pillow package.
These programs work best with simple images, especially ones that don’t have backgrounds. Shaw’s program uses the ansicolors package to add some color to your ASCII art.
Here is Shaw’s program in its entirety:
"""
image2ansi.py
usage: image2ansi.py [-h] [--no-color] [--width WIDTH] path
Display an image in ASCII with ANSI colors
positional arguments:
  path           the path to the image file
optional arguments:
  -h, --help     show this help message and exit
  --no-color     no ANSI colors
  --width WIDTH  output width in characters (Default 120)
Features:
 - Converts ALPHA channel to whitespace (transparency)
 - Uses a sharpness filter to improve the output
Requires:
 - Python 3
 - Pillow
 - ansicolors

Install:
 - pip3 install pillow ansicolors
"""

import argparse
from PIL import Image, ImageEnhance

from colors import color


def render(image_file, width=120, height_scale=0.55, colorize=True):
    img = Image.open(image_file)

    org_width, orig_height = img.size
    aspect_ratio = orig_height / org_width
    new_height = aspect_ratio * width * height_scale
    img = img.resize((width, int(new_height)))
    img = img.convert('RGBA')
    img = ImageEnhance.Sharpness(img).enhance(2.0)
    pixels = img.getdata()

    def mapto(r, g, b, alpha):
        if alpha == 0.:
            return ' '
        chars = ["B", "S", "#", "&", "@", "$", "%", "*", "!", ".", " "]
        pixel = (r * 19595 + g * 38470 + b * 7471 + 0x8000) >> 16
        if colorize:
            return color(chars[pixel // 25], (r, g, b))
        else:
            return chars[pixel // 25]

    new_pixels = [mapto(r, g, b, alpha) for r, g, b, alpha in pixels]
    new_pixels_count = len(new_pixels)
    ascii_image = [''.join(new_pixels[index:index + width]) for index in range(0, new_pixels_count, width)]
    ascii_image = "n".join(ascii_image)
    return ascii_image


if __name__ == "__main__":
    parser = argparse.ArgumentParser(description='Display an image in ASCII with ANSI colors')

    parser.add_argument('path',
                       metavar='path',
                       type=str,
                       help='the path to the image file ')
    parser.add_argument('--no-color',
                       action='store_true',
                       help='no ANSI colors')
    parser.add_argument('--width',
                       action='store',
                       type=int,
                       default=120,
                       help='output width in characters (Default 120)')
    parser.add_argument('--height-scale',
                        action='store',
                        default=.55,
                        type=float,
                        help='scale ratio for height (default .55')
    args = parser.parse_args()
    print(render(
        args.path,
        args.width,
        height_scale=args.height_scale,
        colorize=not args.no_color))
You can use this program on any image that you have. To see how you might use this program, you can use this photo of the author of this article:

To run the program, you would open up a terminal and change directories until you were in the same folder that the program is saved to. Then you would run the following command:
python3 image2ansi.py my_photo.jpg
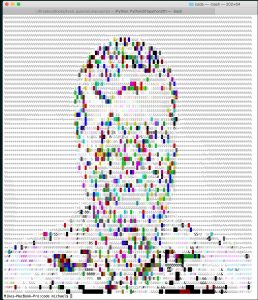
When you run this program against the image above, you will get the following output:

You can see that the conversion removes a lot of detail from the image, which is to be expected.
Now let’s try this program against a simpler image, like Tux, the penguin:

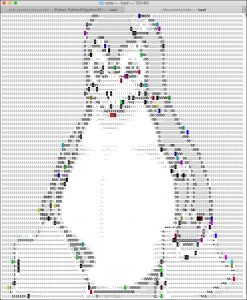
When you run image2ansi.py against this image, your output will look like this:

This conversion looks a lot more like the original image than the previous one did.
Programs like image2ansi.py are a lot of fun to play around with. Go give it a try or see if you can come up with a better one. Have fun and happy coding!
The post Converting an Image to ASCII with Python appeared first on Mouse Vs Python.


