Ideally, you want to pick a reliable web hosting provider, so you don’t have to move your website. But it’s possible that you’re unsatisfied with the current web host’s quality of service or simply wish to upgrade to something better.
You might be stressed if you find yourself in this predicament, and honestly, I don’t blame you. It definitely sounds daunting. But that’s just it—it only “sounds” daunting.
In reality, migrating a website does not have to be complicated.
In this guide, I’ll give you a run through the steps required to move your WordPress website to a new host or server. But before we proceed, you should know that many WordPress hosting companies offer free migration. So make sure you ask the hosting provider as it may not be listed on the website.
What to Expect When Moving WordPress to a New Host or Server
Migrating to another web host isn’t that difficult. All you need is the right guidance, which is exactly why I created this guide. Here’s what you need to do:
- Step 1 — Back Up Your WordPress Website Files
- Step 2 — Import Your WordPress Website to the New Host
- Step 3 — Eliminate Downtime by Changing the Hosts File
- Step 4 — Create MySQL Database on Your New Host
- Step 5 — Start the Website Migration Process
- Step 6 — Update Your Domain Name Servers (DNS)
The Good
The obvious advantage of migrating your WordPress site to a new server or web host is getting better service and performance.
You can get better customer support and see an increase in size performance thanks to better hardware, load time, and uptime. You may also get access to more features like building your own theme, monetizing the website, and installing plugins, among others.
Then there’s the possibility that your new web host’s subscription plans can be cheaper than your previous choice, which means more savings. Trust me, getting a reliable web hosting provider can make a world of difference in your daily life!
What makes this even better is that you can have all this without having to put in too much effort.
Migrating to a new web host is a very straightforward process. The steps are simple—all you have to do is just follow them diligently, and everything will be done in a few hours.
If you find yourself stuck, you can always call up customer service for help. Plus, there are web host providers that offer free migration services. It’s possible you may not have to do anything at all!
The Bad
The whole point of migrating to a new host is getting better service. However, if you end up making the wrong choice, all your efforts will be in vain. Precisely why you should put in a lot of thought when choosing your new hosting provider.
You should know the type of hosting you want—whether it’s shared, cloud, dedicated, or VPS—followed by the downtime, bandwidth, what freebies are included, and most importantly, the security level and support offered by the prospect.
If you’re new to websites, you may find certain terms and processes unfamiliar. Moreover, the whole thing is very comprehensive and precise. You need to follow every step to the T.
This may seem scary, but if you pay attention to what needs to be done, you’ll be able to do them easily.
Step 1 — Back Up Your WordPress Website Files
You must back up every aspect of your website before migrating. In addition to being a website migration requirement, data backup should also be a part of your general WordPress security.
Here’s how you can backup all your WordPress website file:
Installing the Duplicator Plugin
Install and activate the free Duplicator plugin on the WordPress site that you want to move. I highly recommend this plugin as it lets you move your website to a new domain name without losing SEO.
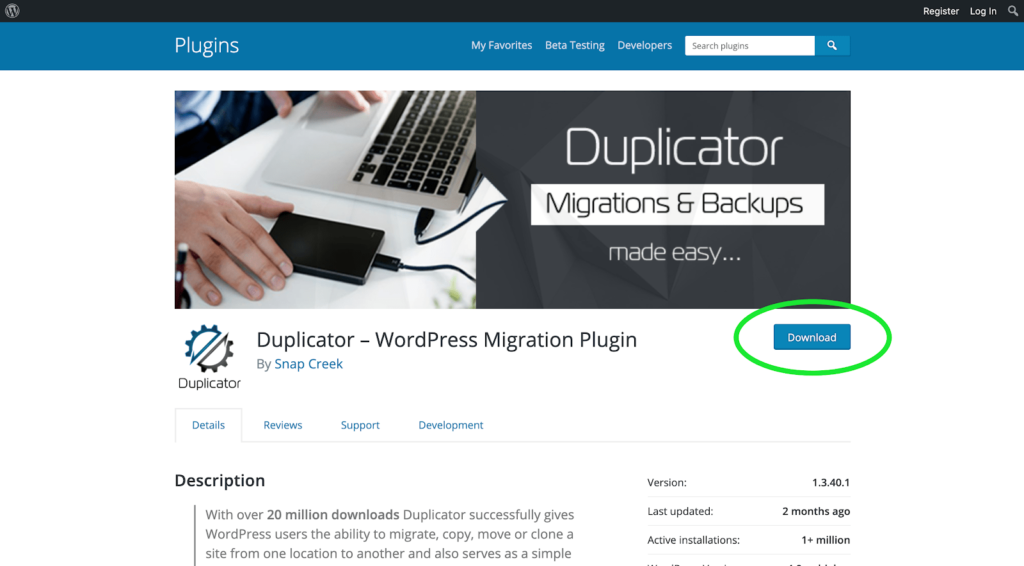
Download the Archive and Installer Files
Once you’ve installed and activated the plugin, click on Duplicator on the WordPress admin area, followed by Packages. Click on the Create New button towards the right-hand side of your screen.
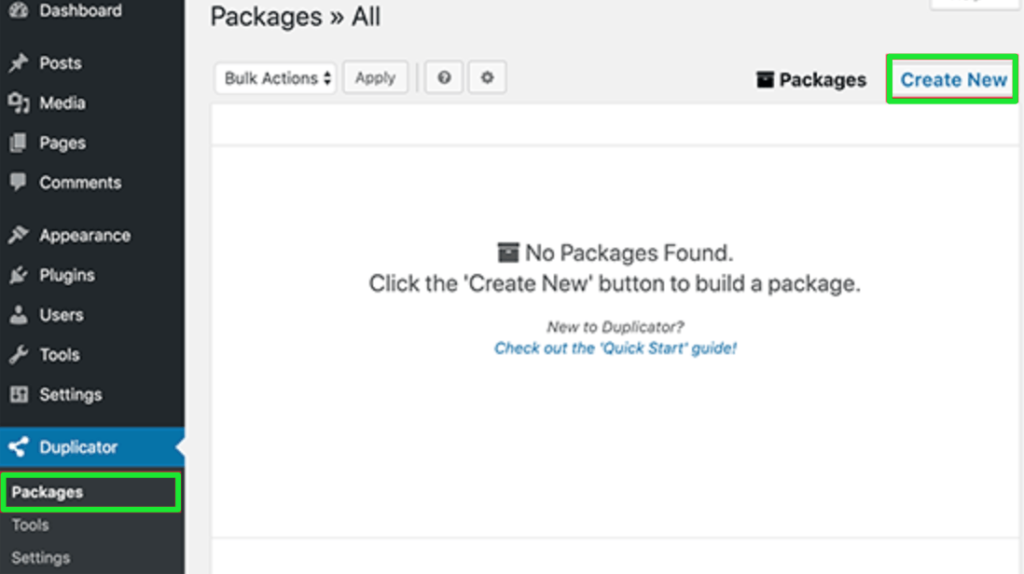
Follow this up by selecting the Next button and the prompts that come up on your screen. This will then create your Duplicator package.
A scanning process will begin (all your results should say ‘Good‘).
Click on Build. The building process takes a couple of minutes, so leave the tab open while the plugin does its job.
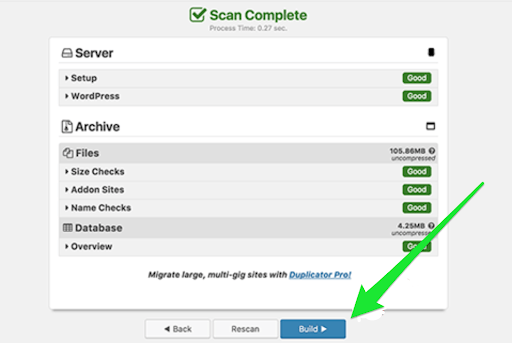
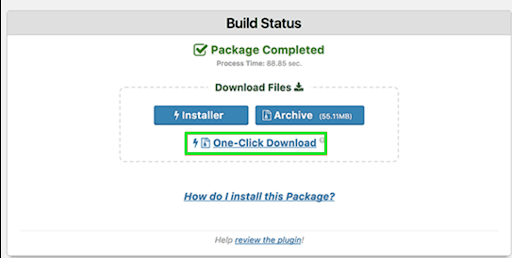
Once it’s complete, you’ll see download options for Installer and the Archive package. The Archive file is a copy of your complete WordPress website, while the Installer file will automate the installation process for you.
Click on the One-Click Download link instead to download both files.
Step 2 — Import Your WordPress Website to the New Host
Next, you will upload the downloaded Archive and Installer files to your new web host.
For this, you’ll have to connect your new web host—something that can be done through the FTP.
Find Out Your Server’s IP Address and Hostname
Enter your website domain name as host when connecting your FTP client. Keep in mind that you‘ll have to enter your server’s IP address or server hostname as your domain name still points to your old hosting provider.
Don’t know your server’s IP address or hostname? No biggie.
You can contact your new web hosting company’s support team or check your new account’s cPanel dashboard.
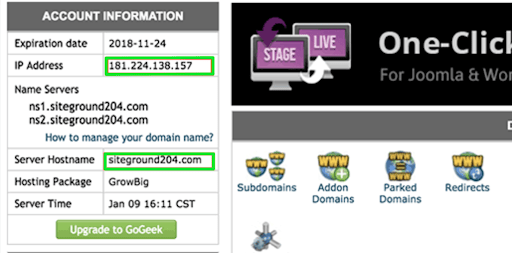
Use the FTP client to upload both the installer.php file and your archive .zip file to your website’s root directory. You can find this by the following: /username/public_html/folder.
Again, if you find yourself lost, simply contact your web hosting company for more guidance.
That said, make sure your root directory is empty. If you have WordPress installed in your root directory, delete it.
Follow this up by uploading both the archive .zip file and installer.php file to the root directory.
Step 3 — Eliminate Downtime by Changing the Hosts File
You need access to the installer.php file in a browser. Typically, you can do this by using the following URL: http://www.example.com/installer.php
But don’t do this right now—it won’t work.
This is because your domain name still points to your old web host, and if you search the URL, you’ll end up getting a 404 error.
Here’s what to do instead:
Add an Entry for Your Domain Name in the Hosts File
You need a host file on your computer to temporarily access your new site without affecting your old site.
A host file allows you to map domain names to specific IP addresses by letting you manipulate your computer into thinking that your website has moved even when it hasn’t.
Find the IP address of your new web hosting server. For this, you have to log in to your cPanel dashboard. Select the expand status link (this is located on the left-hand sidebar).
You’ll find your service address listed as a Shared IP Address. For a few web hosting companies, you can also find this information under the Account Information heading.
The next step will vary depending on whether you use Windows or Mac.
- For Windows Users:
Go to Programs, followed by All Programs and Accessories. Then right-click on Notepad and click on Run as Administrator.
When you select Yes on the Windows UAC prompt, it’ll launch Notepad with administrator privileges.
Once the Notepad screen opens, click on File and Open. Navigate to the C:/Windows/System32/driver/etc folder.
You can now select the host file and open it.
- For Mac Users:
Open the Terminal app, and enter the following command: sudo nano /private/etc/hosts. This will let you edit the host file.
Remember the IP address you found out in Step 2?
Enter it at the bottom of the host file for both Windows and Mac devices. Enter your domain name after this. This is how it should look: 146.168.1.23 www.example.com.
The IP address should be the one you copied from the cPanel dashboard, and example.com should be your domain name.
Save the changes.
You can now access the new host via your old domain name on your computer.
That said, remember whatever you do here, as you’ll have to undo the changes you made to the hosts file after finishing migration (a.k.a Step 6).
Step 4 — Create MySQL Database on Your New Host
You need a MySQL database before running the installer on the new host. If you’ve already created a MySQL database, you can jump ahead to the next step.
If not, I’ve got you.
Create a Database in cPanel
Open your new hosting account in the cPanel dashboard. From there, go to the Databases field, and click on MySQL Database. It looks like this:

In the Create New Database field, enter a name for your database. Then click on the Create Database button.
Go to the MySQL Users field after creating the MySQL database. Enter a username and password, and click on the Create a User button.
Add User to Your Database
You have to add the user to your database to get permission to work on the database.
Scroll to the Add User to a Database field and select the database user you just created from the dropdown menu next to User. Choose the database, and click on Add.

Your database is now ready to use.
Open the Notepad app on your computer, and jot down the database name, username and password—you’ll need it in the next step.
Step 5 — Start the Website Migration Process
Finally, to the main point of this guide.
You’ll run the installer file in this step. Here’s what you need to do:
Connect to Duplicator
Open your browser window, and type in the following address: http://www.example.com/installer.php.
Replace example.com with your domain name.
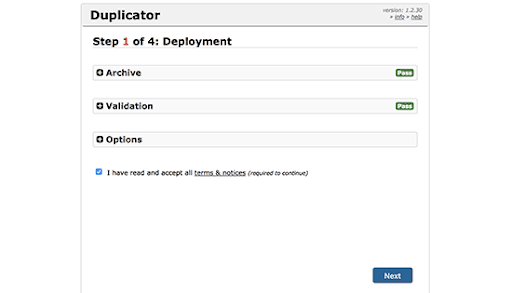
The installer will run a few tests, after which you’ll have to check the terms and conditions checkbox. Click on the Next button.
Enter your MySQL host, database name, username, and password.
Now would be a good time to open the Notepad app to copy-paste in the relevant fields. It’s highly likely for your host to be localhost. After this, enter the details of the database you created in the previous step.
Select Test Database.
If the connection to Duplicator is successful, you’ll see a string starting with Pass. If not, you’ll see database connection error details.
Allow Duplicator to Import WordPress Database
Once Duplicator connects successfully, click on Next to continue.
This will allow Duplicator to import your WordPress database from the archive .zip file into your new database.
You’ll also see options to update the site URL or path. But as you aren’t changing domain names, don’t change anything. Click on Next.
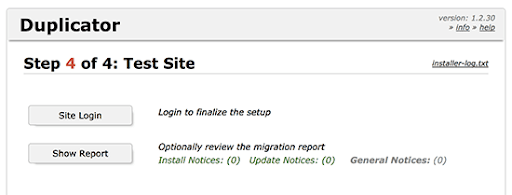
After running the remaining steps, Duplicator will show you the Login button. You can then log in to your WordPress site on the new host to check whether everything was imported successfully.
Step 6 — Update Your Domain Name Servers (DNS)
At this stage, you have a full copy of your WordPress database and files on your new hosting server. The only thing left is to change your domain’s pathway as it currently still points to your old web hosting account.
To update your domain, you’ll have to switch your DNS nameservers. Doing this will direct your users to your website’s new location whenever they look up your domain.
Change Your DNS Nameservers
If you registered your domain name through your web hosting provider, you should simply transfer the domain to a new host—it’s simply more convenient. But if you used a domain registrar like Domain.com for this, it would be wiser to update your nameservers.
Contact your new web host to get the DNS nameserver information. This is typically a couple of URLs, such as:
- ns1.yourhostname.com
- ns2.yourhostname.com
Disclaimer: Changing DNS nameservers will differ depending on your domain registrar or web host. However, the basic concept remains the same.
You have to first look for the domain management area and then the nameservers. Fill in your new hosting provider’s information (the two URLs we discussed above) under nameservers, and you’re done!
If you need any assistance during the process, you can always contact your web hosting company.
Keep in mind that DNS changes take approx 4-48 hours to propagate for all users. But once you click the Save button, all your website content will appear on your new account—without any downtime.
Congratulations! Your WordPress migration is now complete.

